What is Ironing in 3D Printing and How Does It Enhance Your Print Quality
Ever wondered how to make your 3D prints smoother and more polished? Ironing in 3D printing is the secret technique that can transform your prints from rough to refined. This simple yet powerful process smooths out imperfections by passing the hot nozzle over the top layer, giving your print a glossy, flawless finish without the…
Ever wondered how to make your 3D prints smoother and more polished? Ironing in 3D printing is the secret technique that can transform your prints from rough to refined. This simple yet powerful process smooths out imperfections by passing the hot nozzle over the top layer, giving your print a glossy, flawless finish without the need for extensive post-processing. Whether you’re crafting intricate models or creating functional prototypes, ironing enhances the quality of your prints, reducing visible layer lines and improving surface clarity.
What is Ironing in 3D Printing?
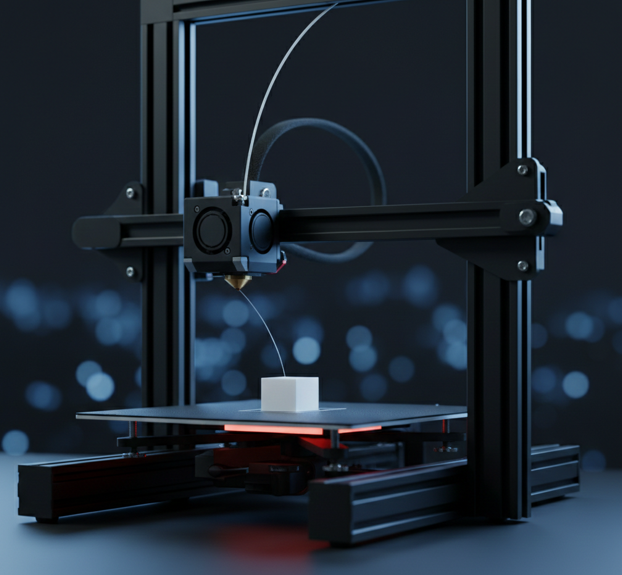
Ironing in 3D printing refers to a technique where the printer’s heated nozzle passes over the top layer of a print multiple times, depositing a fine layer of filament to smooth out surface imperfections. This process improves the appearance of the print by reducing the visibility of layer lines and giving it a more polished, glossy finish.
Inspired by the traditional concept of ironing clothes, where a hot iron smoothens wrinkles and creases, 3D ironing mimics this effect without applying physical pressure. Instead, the nozzle gently smooths the surface by extruding small amounts of filament, filling in any inconsistencies for a cleaner, more refined result. Unlike conventional ironing, the 3D printer’s nozzle creates a smooth, uniform finish with minimal effort.
How Does Ironing Work in 3D Printing?
Once ironing is enabled in your slicer settings, the printer begins the process after completing the top layer of the print. Here’s a detailed breakdown of how ironing works:
Heating the Top Layer
The first step involves the hot nozzle reheating the top surface of the print. The nozzle moves over the top layer, preparing the surface for smoothing. This step targets the areas with visible imperfections such as layer lines and uneven spots. Heating ensures that the filament is soft and malleable, making it easier to smooth.
Smoothing with the Hot Nozzle
Once the top layer is adequately heated, the nozzle moves over the surface in a controlled, often diagonal, pattern. The nozzle’s heat helps smooth out the unevenness left by the initial layers. This action differs from regular printing, where the nozzle prints flat surfaces in straight lines. By moving diagonally (or in concentric/rectilinear patterns if set), the nozzle ensures that every part of the surface is evenly addressed, creating a smoother finish.
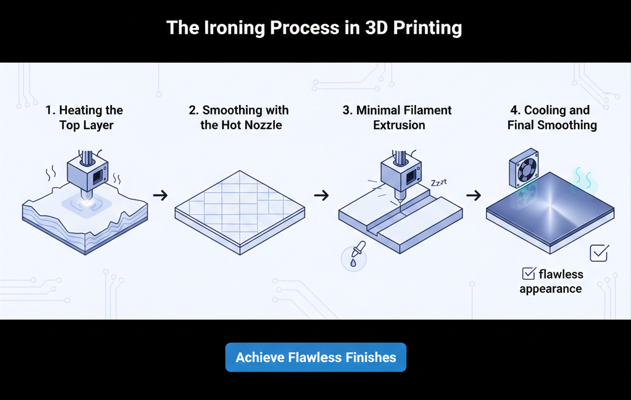
Minimal Filament Extrusion
Contrary to the usual printing process, ironing involves extruding very small amounts of filament. The extrusion rate is low, especially when using materials like PLA, which has a low print temperature. The nozzle deposits just enough filament to fill any minor gaps or uneven spots without significantly adding more material. This gives the print a polished look while maintaining the integrity of the original design.
Cooling and Final Smoothing
Finally, the fan kicks in, facilitating the cooling process of the newly extruded filament. As the print cools, the surface hardens, leaving behind a smooth, shiny finish. This combined action of heating, smoothing, and minimal extrusion is what gives your 3D print a flawless, professional appearance, free from visible layer lines or imperfections.
How to Enable and Configure 3D Ironing?
Enabling and configuring 3D ironing varies slightly depending on the slicer you’re using. Here’s how to set up ironing in popular slicers like Creality Print and Cura:
Creality Print
To enable ironing in Creality Print, follow these steps:
- Enter the Advanced Setting Mode.
- Navigate to Print Settings and then click on Infill.
- In the Infill section, you’ll find the Ironing Feature. You can toggle it on or off here.
- You can further customize the ironing settings, including adjusting the flow rate, pattern, and spacing to suit your needs.
Cura
To enable ironing in Cura, follow these steps:
- Click the hamburger icon (located next to the search bar in settings).
- Select Manage Setting Visibility to access all features.
- Search for the Ironing Feature and enable the settings you want to adjust.
Ironing Pattern
In Cura, you can control the ironing pattern, which affects the visual result:
- Concentric: Ideal for circular objects.
- Zigzag: Great for faster prints with a more uniform finish.
- Rectilinear: Offers a linear pattern suitable for other shapes.
- Experiment with different patterns to see which provides the best result for your specific print.

Flow Rate
The flow rate controls the amount of filament extruded during the ironing process. Most slicers set it to 10% by default, but you can adjust it between 5% to 15%:
- Lower flow rates reduce over-extrusion and improve smoothing.
- Be cautious, as too much extrusion can cause mismatched parts or an overly thick surface, leading to a poor finish or incorrect fit for mated components.
Ironing Speed
The ironing speed can also be adjusted. Slower speeds between 10mm/s to 20mm/s yield better results but increase print time. Faster speeds may reduce ironing effectiveness. Finding a balance between quality and speed is key for optimal results.
Spacing
Spacing is the distance between the nozzle and the print surface, usually set at 0.1mm. This distance directly affects smoothness:
- Too close: Increases the chance of nozzle clogging.
- Too far: Reduces the effectiveness of heating the top layer, requiring more filament to be extruded. Aim for a balance between 0.1mm and 0.15mm for the best results.
Ironing Temperature
Finally, adjusting the ironing temperature can improve the smoothness of your prints:
- Higher nozzle temperatures help materials like ABS and PETG melt more effectively.
- For materials like PLA, a slightly lower nozzle temperature is typically preferable.
These settings offer flexibility to fine-tune ironing to meet your specific printing needs and material types.
What Factors Impact 3D Printing Ironing Results?
The quality of 3D printing ironing depends on several key factors.
Material
Material Type plays a significant role. PLA is the easiest to iron, providing a smooth surface with minimal extrusion. PETG can create strings, so keeping the flow rate low helps prevent excess filament. ABS requires controlled cooling to avoid warping, and a higher extrusion temperature is needed to achieve a smooth finish.
Nozzle Size
Nozzle Size also affects ironing. A 0.4 mm nozzle is a good default, but larger nozzles may leave faint grooves unless you adjust the line spacing to be tighter. Smaller nozzles may require slower speeds to avoid over-extrusion.
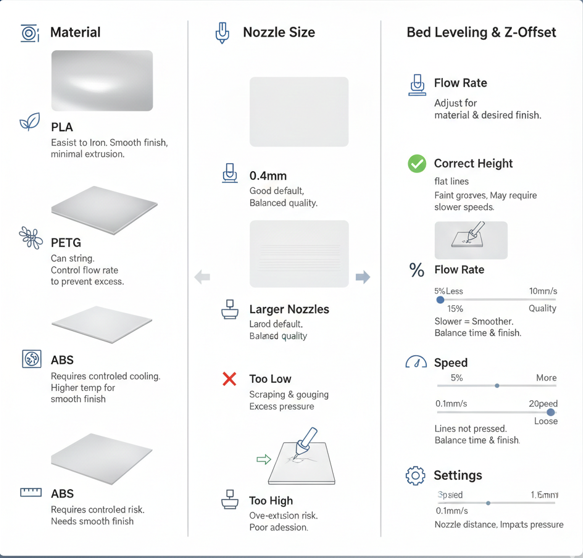
Bed Leveling and Z-Offset
Bed Leveling and Z-Offset are crucial for success. The bed must be level, and the nozzle must be at the correct height. If the nozzle is too low, it can scrape the part, and if it’s too high, it won’t press the lines flat, leading to a poor finish.
When these factors are properly adjusted, the result is a glossy, smooth top surface with minimal visible layer lines.
What Are the Perks of Ironing in 3D Printing?
Ironing enhances your 3D prints by smoothing surfaces, improving detail clarity, and reducing the need for post-processing, resulting in a more professional and polished finish. For other techniques that help ensure stable and high-quality prints, explore our guide on what rafts are and when to use them in 3D printing.
Smoother Surface Finish
Ironing helps smooth out visible layer lines, resulting in a polished, uniform surface. This is ideal for prints where appearance is crucial, such as prototypes or models.
Improved Print Quality
By redistributing the filament and filling in imperfections, ironing improves surface consistency. This leads to a higher-quality print, with fewer visible flaws.
Enhanced Detail Visibility
Ironing flattens the top layer, making intricate details more defined and crisp. This is particularly beneficial for complex prints where fine features need to stand out.
Reduced Post-Processing
With ironing, prints often come out smoother, reducing the need for time-consuming post-processing like sanding or polishing, saving you valuable time.
Better Glossiness and Shine
The ironing process creates a glossy, shiny finish that enhances the overall visual appeal. This gives your prints a professional and refined appearance, perfect for display pieces.
Tips for Successful Ironing in 3D Printing
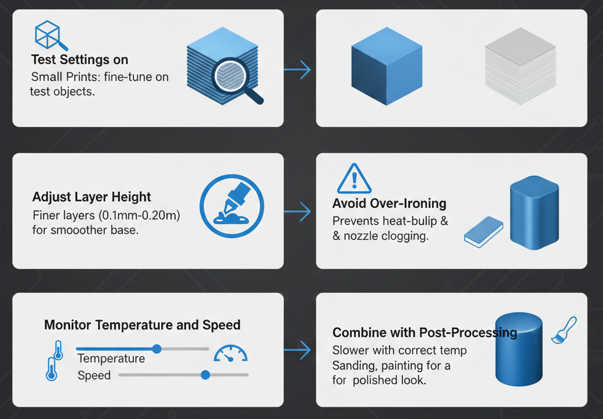
- Test Settings on Small Prints: Start by calibrating and testing ironing on smaller prints. This allows you to fine-tune the settings before using them on larger, final prints.
- Adjust Layer Height: For the best results, use finer layer heights between 0.1mm and 0.2mm. This helps create a smoother surface, enhancing the effectiveness of the ironing process.
- Avoid Over-Ironing: Too much ironing can lead to excessive heat build-up and potential nozzle clogging. Start with moderate settings and gradually adjust as needed for optimal results.
- Combine with Post-Processing: While ironing improves surface flatness, pairing it with post-production techniques like sanding or painting can further elevate the finish, providing a near-perfect result.
- Monitor Temperature and Speed: Keep a close eye on the ironing temperature and speed settings. Too high a temperature or too fast a speed can compromise the quality of the finish, while slower speeds with optimal temperature provide better smoothing and consistency. If you’re also looking to improve bed adhesion or minimize first-layer issues before applying ironing, check out our 3D printing raft guide to enhance stability and surface quality.
Conclusion
Ironing in 3D printing offers a simple yet effective way to elevate your print quality. It’s not just about smoothing surfaces; it’s about achieving a professional, refined finish straight off the printer. By mastering ironing settings and understanding how to balance speed, temperature, and material, you can reduce the need for additional post-processing, saving both time and effort. Experiment with different configurations to unlock the full potential of your 3D prints, and watch as your designs reach new levels of precision and perfection.
Do all slicers support ironing?
Most modern slicers like Cura, Creality Print, PrusaSlicer, and Bambu Studio support ironing, but the location and name of the setting may differ. Always switch to the advanced or expert mode to see all ironing options
Does ironing work on curved surfaces?
Ironing is most effective on flat, horizontal surfaces. It doesn’t smooth curved or non‑flat areas very well because the nozzle can’t apply even thermal contact on tilted faces
Will ironing increase my print time?
Yes, ironing adds extra passes over the top layer, which typically increases print time by 10–30%, depending on the size of the surface being ironed
Can ironing ruin a print?
If settings are too aggressive (e.g., high flow rate, excessive heat), ironing can cause issues like nozzle dragging or slight surface distortion. Starting with moderate settings and testing small prints helps prevent this.
Should I use ironing on functional parts?
Ironing mainly improves visual surface finish, it does not always improve mechanical strength. For functional parts, it still helps with flat interfaces or lids where a smooth contact surface is needed.

I share practical insights on the latest 3D-printing software and hardware, helping makers navigate tools and technologies with confidence. My goal is to make digital fabrication simple and accessible for everyone.