How to Use a Creality Slicer with the Creality Sermoon Series Printers?
The Creality Sermoon slicer guide is a Series consists of advanced 3D printers, including popular models like the Sermoon V1, V1 Pro, and D3. These printers are known for their enclosed design, stability, and high-quality print outputs. To fully harness their capabilities, Creality provides a dedicated slicer tool known as Creality Print (also called Creality…
The Creality Sermoon slicer guide is a Series consists of advanced 3D printers, including popular models like the Sermoon V1, V1 Pro, and D3. These printers are known for their enclosed design, stability, and high-quality print outputs. To fully harness their capabilities, Creality provides a dedicated slicer tool known as Creality Print (also called Creality Slicer). This slicer is optimized for Creality’s 3D printers, offering presets and settings tailored specifically to these machines.
What Is Creality Slicer?
Creality Slicer is a slicing software designed to convert 3D models into printable instructions (G-code). It is specifically optimized for Creality printers, including the Sermoon series, and offers a simplified workflow with settings that match the hardware specifications of these machines.
Key Features:
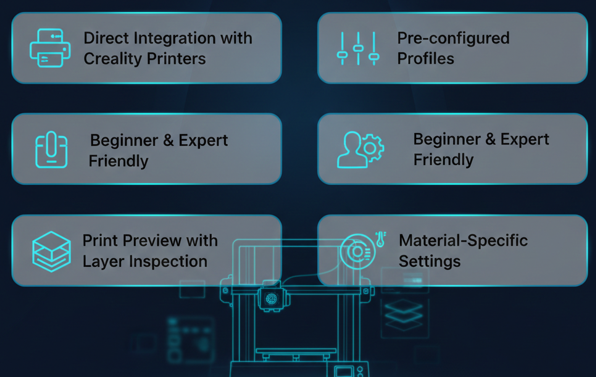
- Direct Integration with Creality printers
- Pre-configured profiles for Creality printers
- Ease of use for both beginners and experts
- Print preview to inspect layer details
- Material-specific settings for various filaments
Installing Creality Slicer
Before you begin, make sure you have Creality Slicer installed on your computer. Here’s how you can get it: as we explain in our detailed Creality Print Quick Start Guide, which walks through system requirements and initial setup.
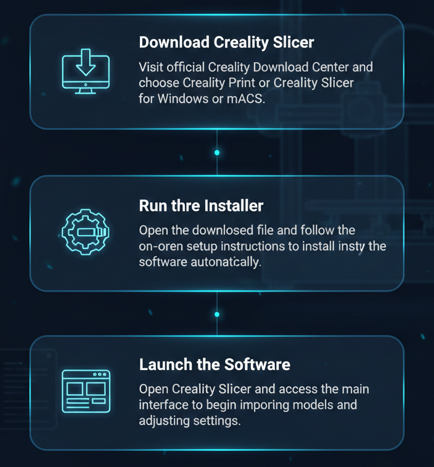
Download Creality Slicer: Go to the official Creality Download Center and select Creality Print or Creality Slicer for your operating system (Windows/macOS).
Run the Installer: After downloading, run the installer and follow the on-screen prompts. It will automatically set up the slicer on your computer.
Launch the Software: Once installation is complete, open Creality Slicer. You will see the main interface where you can start importing models and configuring settings.
Adding Your Sermoon Printer to Creality Slicer
Once the slicer is installed, the next step is to connect your Sermoon printer to the software. Here’s how you can do it:
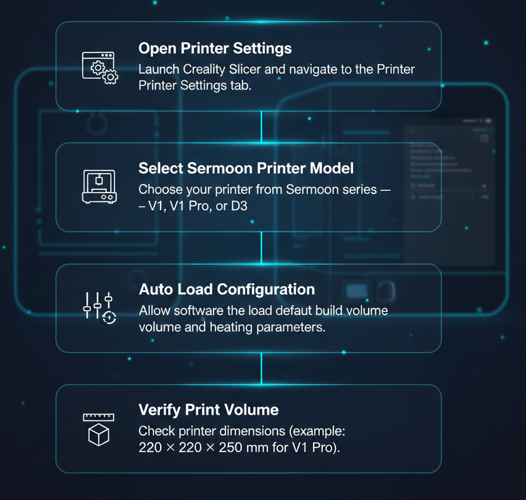
- Launch Creality Slicer and click on the Printer Settings tab.
- Select Your Printer Model: From the list, choose the appropriate model from the Sermoon series (Sermoon V1, V1 Pro, or D3).
- Configure Printer Settings: After selecting your printer, the software will automatically load default settings that match your printer’s build volume, heating specifications, and other key features.
- Adjust Print Volume: Double-check the print volume settings to make sure they match your printer’s specifications (for example, the V1 Pro has a print size of 220 x 220 x 250 mm).
Importing and Preparing 3D Models
With your printer set up, you can start importing 3D models into the slicer. Here’s how to prepare them for slicing:
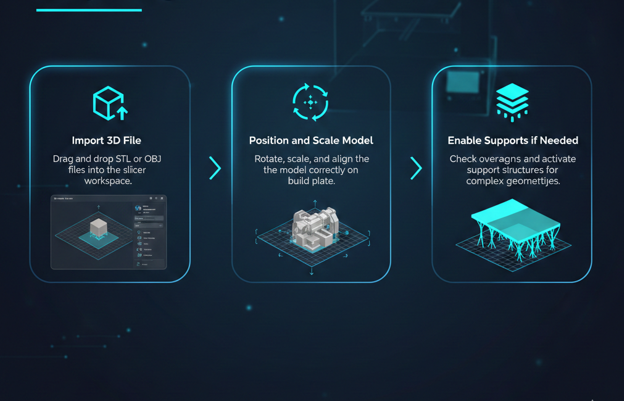
- Import Your 3D Model: Click on the Import button or drag-and-drop the 3D file (e.g., STL, OBJ) into the slicer workspace.
- Position and Scale the Model: Once your model is imported, use the built-in tools to scale, rotate, or position it correctly on the build plate.
- Check for Overhangs and Supports: Ensure the model is oriented correctly to minimize the need for support structures. If there are overhangs or complex geometries, you may need to enable support structures.
Key Slicing Settings for Sermoon Series Printers
The power of Creality Slicer lies in its customizable settings that can optimize your printing experience. For a deeper breakdown of slicer settings and how they influence your print outcomes, check our complete guide on Creality Slicer Settings, which provides detailed visuals and explanations of each parameter.
Here’s an overview of the most important settings you’ll need to adjust.
Basic Settings:
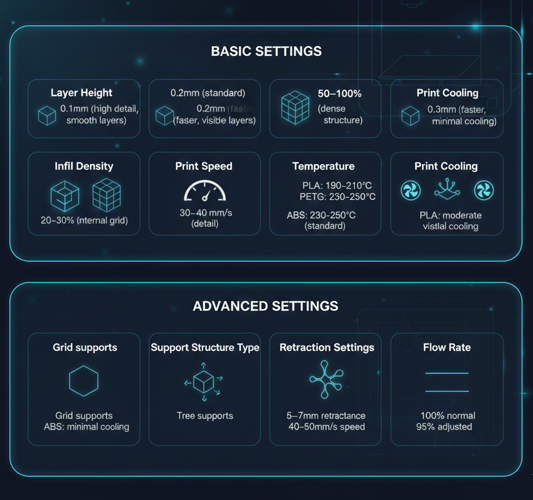
- Layer Height:
- Standard for most prints: 0.2mm
- Higher detail: 0.1mm
- Faster prints (lower detail): 0.3mm
- Infill Density:
- For most functional prints: 20%-30%
- For highly durable parts: 50%-100%
- Print Speed:
- General settings: 50-60 mm/s
- Slower speeds for better detail: 30-40 mm/s
- Temperature Settings:
- PLA: 190-210°C
- ABS: 230-250°C
- PETG: 230-250°C
- Print Cooling:
- PLA: Moderate cooling, especially for fine details.
- ABS: Minimal cooling to prevent warping.
Advanced Settings:
- Support Structure Type:
- For most prints with overhangs, select Grid or Tree Supports (for organic shapes).
- Adjust support density to balance ease of removal and stability.
- Retraction Settings:
- Retraction is crucial for preventing stringing. For Creality Sermoon printers, a retraction distance of 5-7mm is typical, with a retraction speed of 40-50mm/s.
- Flow Rate:
- If you encounter over-extrusion, adjust the flow rate slightly (e.g., 95% of default).
Slicing and Exporting G-code
Once your settings are in place, it’s time to slice the model and generate the G-code.
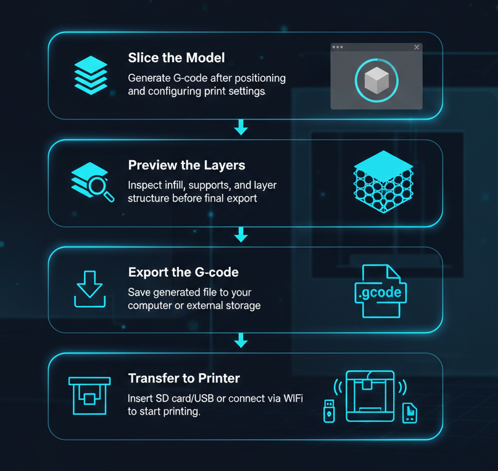
- Slice the Model: After positioning your model and adjusting settings, click Slice to generate the G-code.
- Preview the Layers: Use the preview option to inspect how the layers are built, ensuring that supports and infill are correctly set.
- Export the G-code: After previewing the layers, save the G-code file to your computer or directly to an SD card/USB drive.
- Transfer to Printer: Insert the SD card/USB into your Sermoon printer, or connect via Wi-Fi if your model supports it.
Printing with Your Sermoon Series Printer
Now that your G-code is ready, you can start the printing process. Here’s a quick rundown:
Insert SD Card or USB into Printer
If you haven’t already done so, insert the storage device containing your G-code into the printer.
Start the Print
On your Sermoon printer, navigate to the File menu and select the G-code file you’ve created.
Monitor the Print
Keep an eye on the first few layers to ensure good adhesion to the build plate. You can also monitor the print via Creality Cloud if your printer is connected.
Troubleshooting Common Issues
While Creality Slicer simplifies the process, it’s common to encounter issues during printing. Here are some tips for troubleshooting:
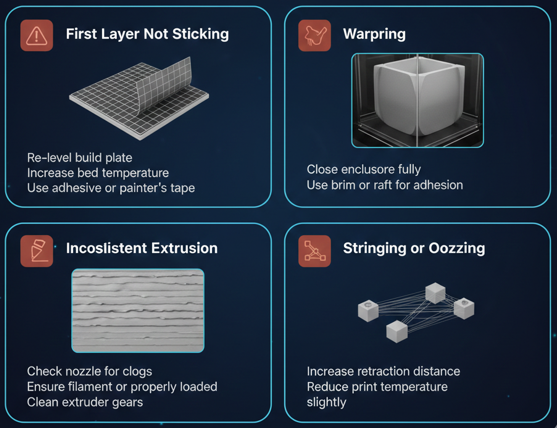
Common Issues and Solutions:
- First Layer Not Sticking:
- Re-level the build plate.
- Increase the bed temperature or use a heated bed.
- Use adhesive or painter’s tape for better adhesion.
- Warping:
- Ensure the printer’s enclosure is fully closed.
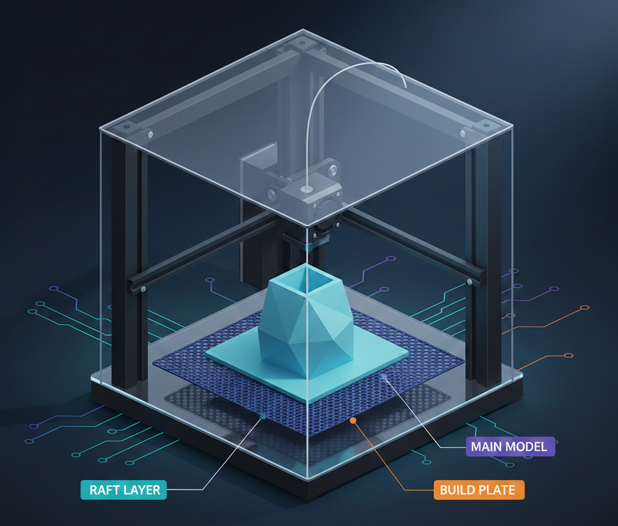
- Use a brim or raft to improve adhesion on larger prints.
- Inconsistent Extrusion:
- Check for clogs in the nozzle.
- Ensure the filament is properly loaded and that the extruder gears are clean.
- Stringing or Oozing:
- Increase retraction distance.
- Reduce print temperature slightly.
Optimizing Prints for Different Materials
The Sermoon series works well with a variety of materials. Here are some tips for optimizing your slicer settings based on the material you’re using:
PLA
PLA is easy to print with, and Creality Slicer has optimized settings for it. Ensure proper cooling and use standard layer heights (0.2mm).
ABS
ABS requires a heated bed and enclosure to prevent warping. Use a slightly higher printing temperature (230°C) and lower the cooling rate.
PETG
PETG prints at high temperatures (around 250°C) and is more flexible than PLA, so use moderate cooling.
Advanced Features in Creality Slicer
For experienced users, Creality Slicer offers some advanced features for print customization:
Multiple Material Support
If your printer supports multi-material setups, you can assign different materials to specific parts of the model, creating more complex, multi-color prints.
Custom Profiles
You can save your print settings as a custom profile for future use, enabling you to quickly switch between different print types (e.g., high detail, functional prints).
Final Words
Using a Creality Slicer with your Sermoon Series Printer doesn’t have to be difficult. With this guide, you can quickly get started by understanding the software installation, importing models, optimizing settings, and troubleshooting common printing issues. For more expert guides and slicer tutorials, visit the official hub at The Creality Slicer.
By tailoring your slicing settings to match the capabilities of the Creality Sermoon V1, V1 Pro, and D3, you can ensure that every print is as high-quality as possible. Whether you’re just starting or you’re an experienced maker, Creality Slicer offers a powerful toolset to elevate your 3D printing projects.
Can I use Creality Slicer with other 3D printers besides the Sermoon series?
While Creality Slicer is primarily designed for Creality printers, it can be used with other FDM 3D printers as long as the G-code is compatible. However, it is optimized for Creality’s own machines, so some fine-tuning may be required for non-Creality printers.
How do I adjust print settings for better print quality with Creality Slicer?
To improve print quality, try lowering the layer height for finer details, reducing print speed, and adjusting infill density for stronger parts. Additionally, using supports effectively can help prevent print failures with complex geometries.
Can I print multiple objects at once using Creality Slicer?
Yes, Creality Slicer allows you to print multiple objects simultaneously by importing several models and arranging them on the build plate. The software ensures that the G-code is optimized for multiple objects, minimizing the risk of overlap or interference.
How do I calibrate my Creality Sermoon printer using Creality Slicer?
Creality Slicer doesn’t directly calibrate your printer, but you can use it to test calibration settings. Run calibration cubes, check your extrusion settings, and adjust the retraction distance or layer height as needed to achieve consistent, accurate prints.
What are the best material settings for printing with flexible filaments on the Sermoon series?
When using flexible filaments like TPU or TPE, lower the print speed (around 20-30 mm/s) and increase the retraction distance slightly. It’s also important to use moderate temperatures (around 220°C) and ensure your printer’s extruder setup is compatible with flexible materials.

I share practical insights on the latest 3D-printing software and hardware, helping makers navigate tools and technologies with confidence. My goal is to make digital fabrication simple and accessible for everyone.