How to Set Up a Creality Slicer for the Ender 3 V2?
The Ender 3 V2 is a popular 3D printer in the world of DIY and professional 3D printing, known for its reliability, affordability, and high-quality prints. However, to unlock its full potential, selecting the right slicing software is crucial. Creality Slicer, based on Cura, is designed specifically for Creality printers, offering an easy-to-use interface and…
The Ender 3 V2 is a popular 3D printer in the world of DIY and professional 3D printing, known for its reliability, affordability, and high-quality prints. However, to unlock its full potential, selecting the right slicing software is crucial. Creality Slicer, based on Cura, is designed specifically for Creality printers, offering an easy-to-use interface and optimized print profiles for machines like the Ender 3 V2.
This guide will walk you through setting up Creality Slicer for your Ender 3 V2, covering everything from installation to advanced settings, so you can achieve the best possible results in your 3D printing journey.
What Is Creality Slicer?
Creality Slicer is a software application that translates 3D models (STL, OBJ, 3MF) into G-code, the language understood by 3D printers like the Ender 3 V2. While other slicers like Cura and PrusaSlicer are widely used in the community, Creality Slicer is optimized for Creality printers, making it a seamless choice for users of machines like the Ender 3 V2 and Ender 3 V2 Neo.
Why Use a Creality Slicer?
- Preconfigured printer profiles for Ender 3 V2 ensure optimal settings for Creality machines.
- Simple interface that is intuitive for beginners while still offering powerful features for advanced users.
- Frequent updates from Creality keep the slicer optimized with the latest printer features and improvements.

Why Choose a Creality Slicer for the Ender 3 V2?
There are several reasons why Creality Slicer stands out as a perfect choice for users of the Ender 3 V2:
Optimized for Ender Printers
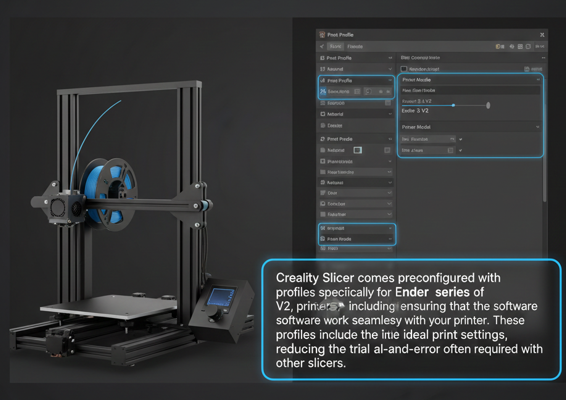
Creality Slicer comes preconfigured with profiles specifically for the Ender series of printers, including the Ender 3 V2, ensuring that the software works seamlessly with your printer. These profiles include the ideal print settings, reducing the trial-and-error often required with other slicers.
Streamlined and Easy-to-Use
Compared to other slicers like PrusaSlicer or Cura, Creality Slicer is easier for beginners to pick up. The interface is straightforward, with fewer complex options than other slicers, allowing users to start printing almost immediately after installation.
Tailored Support for Features
Creality Slicer includes specific support for features found on Creality printers, such as auto-bed leveling, BLTouch, and Creality Sonic Pad integration (for Ender 3 V2 Neo). These features make the setup process easier and improve the overall print quality.
Downloading and Installing Creality Slicer
Before we dive into the setup process, let’s go over how to download and install Creality Slicer.
Step 1: Visit the Official Creality Website
Go to the official Creality website and navigate to the download section for Creality Slicer. Select your operating system:
- Windows
- macOS
- Linux
Step 2: Install the Software
Once you’ve downloaded the installer for your operating system, follow the steps below:
For Windows:
- Run the .exe installer.
- Accept the terms and conditions.
- Choose the installation folder.
- Complete the installation by clicking Finish.
For macOS:
- Open the .dmg file.
- Drag Creality Slicer into your Applications folder.
- Launch the app from Applications.
For Linux:
- Extract the .tar.gz file.
- Open the terminal and navigate to the folder containing the extracted files.
- Run the executable file.

Configuring Printer Profile: Ender 3 V2 vs Ender 3 V2 Neo
One of the most important steps in setting up Creality Slicer is selecting and configuring the printer profile correctly. The Ender 3 V2 and Ender 3 V2 Neo share a lot of similarities, but there are some differences.
Selecting the Correct Profile
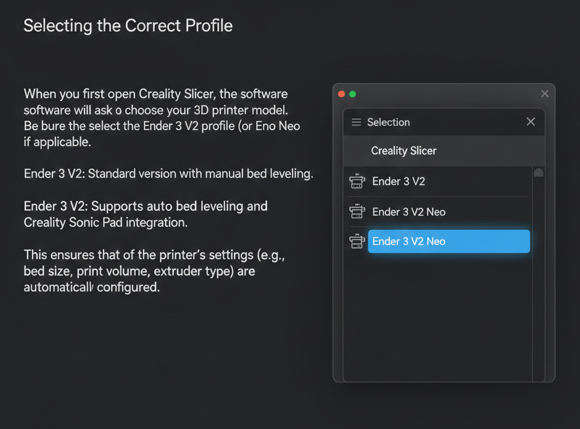
When you first open Creality Slicer, the software will ask you to choose your 3D printer model. Be sure to select the Ender 3 V2 profile (or Ender 3 V2 Neo if applicable).
- Ender 3 V2: Standard version with manual bed leveling.
- Ender 3 V2 Neo: Supports auto bed leveling and Creality Sonic Pad integration.
This ensures that all of the printer’s settings (e.g., bed size, print volume, extruder type) are automatically configured for you.
First-Time Slicer Setup (Step-by-Step)
Once you’ve installed the software and selected your printer profile, follow these steps to configure your first print.
Step 1: Open Creality Slicer
Launch the Creality Slicer software and ensure that you’ve selected the correct printer profile (Ender 3 V2).

Step 2: Set Your Printer’s Build Volume
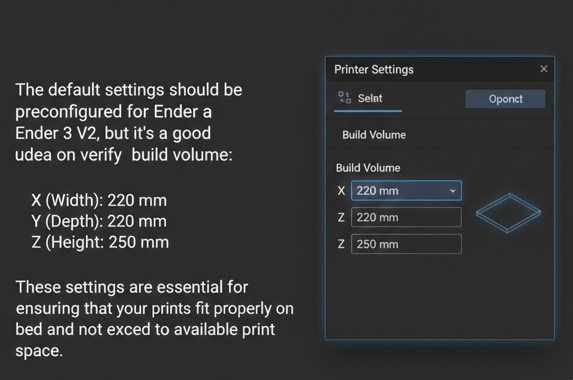
The default settings should be preconfigured for the Ender 3 V2, but it’s always a good idea to verify the build volume:
- X (Width): 220 mm
- Y (Depth): 220 mm
- Z (Height): 250 mm
These settings are essential for ensuring that your prints fit properly on the bed and do not exceed the available print space.
Step 3: Set the Extruder Type
Most Ender 3 V2 printers are single extruder machines, so select Single Extruder under the Extruder Settings.

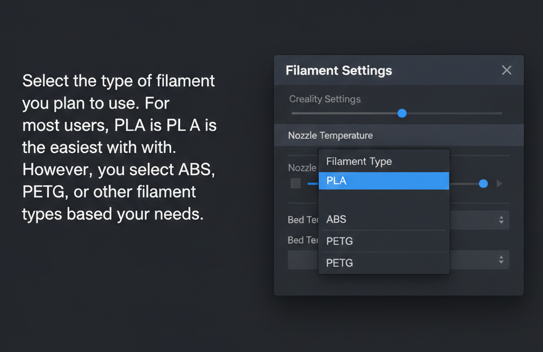
Step 4: Choose Filament Type
Select the type of filament you plan to use. For most users, PLA is the easiest to print with. However, you can select ABS, PETG, or other filament types based on your needs.
Step 5: Set Print Settings
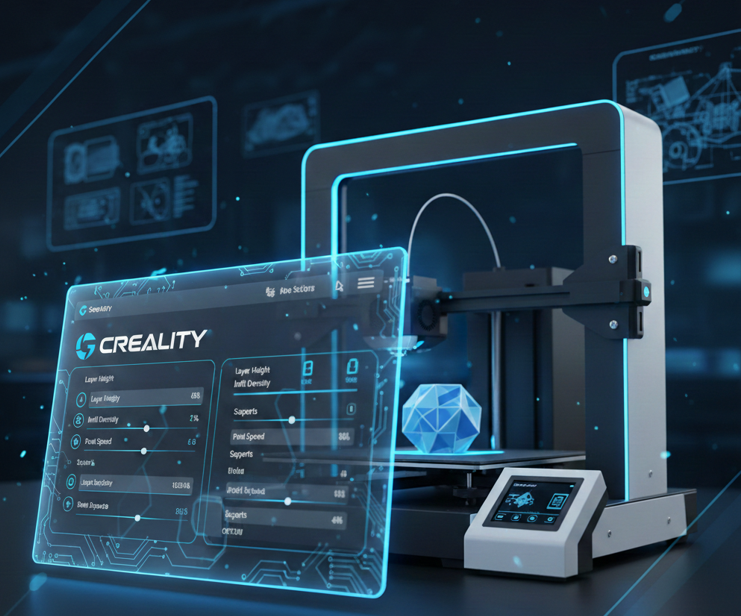
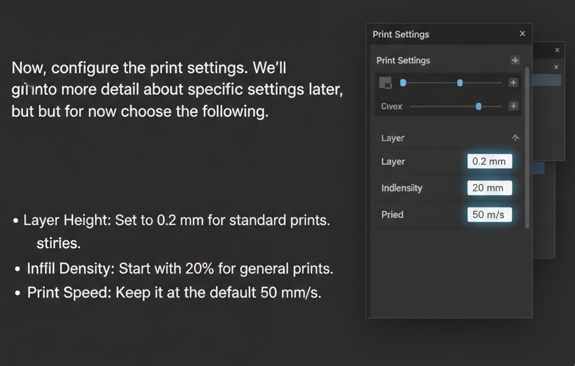
Now, configure the print settings. We’ll go into more detail about specific settings later, but for now, choose the following:
- Layer Height: Set to 0.2 mm for standard prints.
- Infill Density: Start with 20% for general prints.
- Print Speed: Keep it at the default 50 mm/s.
Detailed Configuration: Print Settings Explained
After you have the basic setup, it’s time to dive into the more detailed print settings. For a deeper look at the optimal configurations and how each parameter influences your print quality, check out this guide on Creality Slicer settings. Let’s go through each setting and explain what it does.
.
Quality Settings
This section determines the quality of your prints:
- Layer Height: Lower layer heights (e.g., 0.1 mm) improve print quality but increase print time. For general prints, a 0.2 mm layer height is a good starting point.
- Wall Line Count: 2-3 wall lines are recommended to ensure the print is strong and durable.
- Top and Bottom Layers: Set to 0.8 mm for a sturdy top and bottom surface.
Infill Settings
Infill determines the internal structure of your print:
- Infill Density: 20% is the default for general prints. Increase to 30% or 50% for stronger, functional prints.
- Infill Pattern: Grid or Tri-hexagon infill patterns are commonly used.
Temperature Settings
- Nozzle Temperature: Start with 200°C for PLA. You may need to adjust based on filament type.
- Bed Temperature: 50-60°C for PLA prints.
Speed Settings
For general prints, keep the print speed around 50 mm/s. Increasing speed can reduce print time but may compromise quality, especially for fine details.
Support Settings
For models with overhangs, enable supports:
- Support Type: Choose Grid or Tree supports based on the complexity of your model.
Common Issues and How to Fix Them
Even with Creality Slicer, you may encounter common issues. Here are some troubleshooting tips:
Issue 1: First Layer Doesn’t Stick
Solution: Re-level the bed and use adhesive aids like glue stick or painter’s tape. You can also experiment with enabling a raft in your slicer — this foundation layer can significantly improve bed adhesion and help avoid first-layer failures (read more about using rafts in 3D printing here)
Issue 2: Stringing
- Solution: Increase retraction distance and speed, and lower the nozzle temperature by 5-10°C.
Issue 3: Warping
- Solution: Use a heated bed and increase the bed temperature to 70-80°C. For ABS, use an enclosure.
Best Settings for Different Materials
PLA Settings
- Nozzle Temp: 200-210°C
- Bed Temp: 50-60°C
- Print Speed: 50 mm/s
PETG Settings
- Nozzle Temp: 230-250°C
- Bed Temp: 70-80°C
- Speed: Slower than PLA
ABS Settings
- Nozzle Temp: 230-250°C
- Bed Temp: 80-100°C
- Speed: Slower; use an enclosure to reduce warping.
Advanced Tweaks for Better Prints
Linear Advance
This setting improves extrusion consistency. If your printer’s firmware supports it, enable it to fine-tune the extrusion.
Cura Plugins
Creality Slicer supports many Cura-derived plugins. Use these to optimize part placement, add modifiers, and adjust supports in more advanced ways.
Final Thoughts
By following this comprehensive guide, you should now be fully prepared to set up Creality Slicer for your Ender 3 V2, allowing you to achieve high-quality prints with minimal effort. For more 3D printing insights and guides, visit the Creality Slicer . to explore tutorials, tips, and tools for your printing journey.
Whether you’re a beginner or an advanced user, Creality Slicer provides the tools and features you need to get the most out of your 3D printing experience.
Remember to keep tweaking and experimenting with the settings to find what works best for your specific projects. Happy printing!
Can I use Creality Slicer with other brands of 3D printers?
Yes, while Creality Slicer is optimized for Creality printers, it can be manually configured to work with other 3D printers. However, you may need to adjust the print settings and profiles to match the specific requirements of different machines.
How do I update Creality Slicer to the latest version?
To update Creality Slicer, simply visit the official Creality website, download the latest version, and install it over your current version. The software should retain your settings, but it’s always recommended to back up any custom profiles before updating.
Does Creality Slicer support multi-material printing?
Creality Slicer supports multi-material printing, but only if you have a multi-extruder setup like the Ender 3 V2 with dual extruders. You’ll need to manually configure the slicer for multi-material printing, selecting the correct extruder and filament for each part.
How can I improve print adhesion on the Ender 3 V2 using Creality Slicer?
To improve print adhesion, use brims or rafts in Creality Slicer. You can also increase the bed temperature and ensure the first layer height is correctly calibrated. Applying a thin layer of glue stick or painter’s tape on the bed can further help with adhesion.
Why is my Creality Slicer not detecting my Ender 3 V2 after installation?
If the Creality Slicer isn’t detecting your Ender 3 V2, try restarting the software or re-selecting the printer profile. Ensure that your printer is connected to your computer via USB or is properly configured to be used with the slicer. If issues persist, reinstalling the software may resolve connectivity problems.

I share practical insights on the latest 3D-printing software and hardware, helping makers navigate tools and technologies with confidence. My goal is to make digital fabrication simple and accessible for everyone.