How to Set Up a Creality Slicer for the Creality CR-10?
Creality Slicer Settings Tips (also known as Creality Print) is an essential step in ensuring that your Creality CR-10 3D printer runs smoothly, efficiently, and produces high-quality prints. Although the software is relatively beginner-friendly, there are several steps and settings you need to configure properly to optimize print results, reduce failure rates, and maintain machine…
Creality Slicer Settings Tips (also known as Creality Print) is an essential step in ensuring that your Creality CR-10 3D printer runs smoothly, efficiently, and produces high-quality prints. Although the software is relatively beginner-friendly, there are several steps and settings you need to configure properly to optimize print results, reduce failure rates, and maintain machine longevity.
What is a Slicer and Why Setup Matters?
Before diving into the specifics of setting up Creality Slicer, it’s essential to understand the role of a slicer in the 3D printing process.
A slicer is a software tool that takes your 3D models (usually in .STL or .OBJ format) and converts them into G-code, a set of machine instructions your 3D printer follows to print an object layer by layer. The slicer decides key factors like:
- Print speed
- Layer height
- Infill density and pattern
- Temperature settings
- Retraction settings (to prevent stringing)
- Support structures (to hold up overhangs)
A badly configured slicer can lead to printing failures like warping, poor adhesion, stringing, or inconsistent layers, all of which waste time and material. A well-configured slicer, on the other hand, ensures your printer is working optimally, giving you better quality prints with minimal failures.

How to Download and Install Creality Slicer?
Here’s how to get started with Creality Slicer:
Step-by-Step Installation Process
- Go to Creality’s Download Center:
Visit the official Creality website to find the latest version of Creality Slicer. Make sure to download the latest version for the best compatibility. - Choose the Right Version:
Select the version of Creality Slicer that matches your operating system (Windows, macOS, or Linux). - Download and Install:
Once downloaded, run the installer and follow the on-screen instructions. This should take only a few minutes. - Launch the Software:
After installation, open Creality Slicer. You should see a basic interface ready for you to configure.

Setting Up Creality Slicer for the CR-10
Adding the CR-10 Printer
Once Creality Slicer is installed, the next step is to add your Creality CR-10 printer.
Step-by-Step Guide to Add CR-10
- Open Creality Slicer:
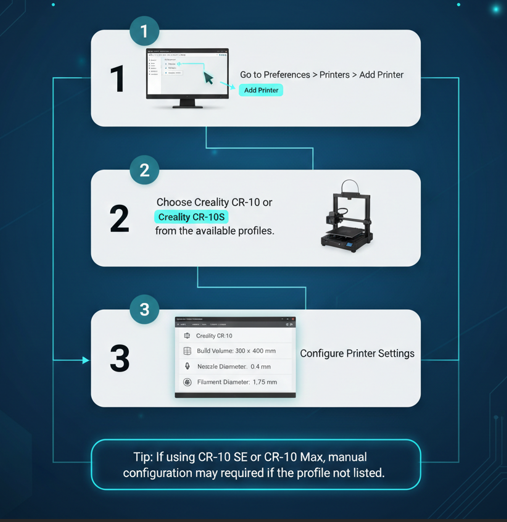
After launching the software, go to the Printer Settings by clicking on Preferences > Printers > Add Printer. - Select the CR-10 Model:
From the list of available printers, select Creality CR-10 or Creality CR-10S (the profiles are interchangeable for the most part). - Configure Printer Settings:
- Build Volume: 300 x 300 x 400 mm (standard for CR-10)
- Nozzle Diameter: 0.4 mm
- Filament Diameter: 1.75 mm
- Tip: If you are using a variant like the CR-10 SE or CR-10 Max, you may need to configure the settings manually if the profile is not listed.
Manual Setup for Missing Profiles
If you can’t find your model’s profile, manual configuration is straightforward. Here’s how:
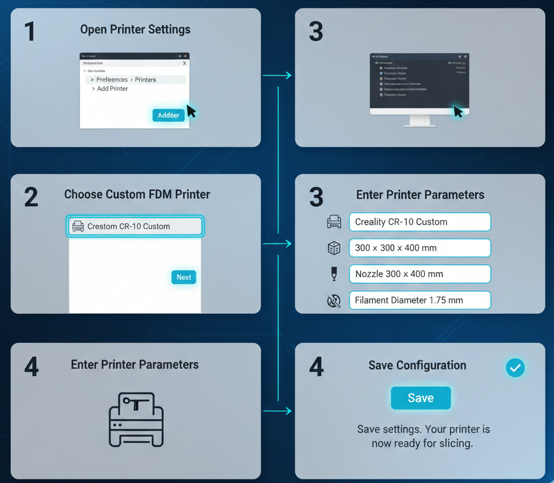
- Go to Preferences > Printers > Add Printer.
- Choose Custom FDM Printer and click Next.
- Fill in the following parameters for your CR-10:
- Printer Name: “Creality CR-10 Custom”
- Print Volume: 300 x 300 x 400 mm
- Nozzle Diameter: 0.4 mm
- Filament Diameter: 1.75 mm
- Save: Once completed, save the settings, and your printer will be ready for slicing.
Key Printer and Print Settings
Key Printer and Print Settings
Now that your printer is set up, it’s time to configure the print settings that will determine how your prints come out. If you want an in-depth walkthrough of detailed Creality Slicer configuration options (including advanced settings, retraction, infill, and support strategies), see the guide on creality slicer settings.
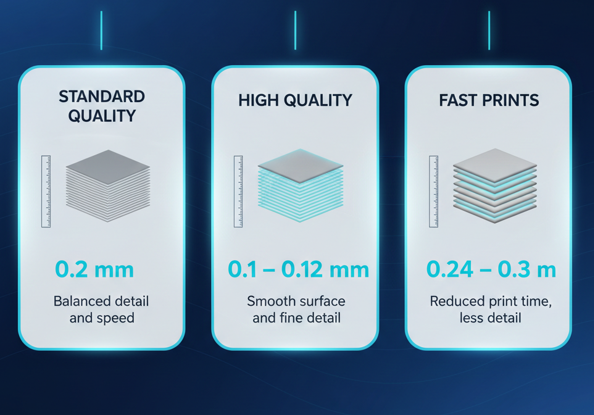
Layer Height
Standard Quality: 0.2 mm
High Quality: 0.1 – 0.12 mm
Fast Prints: 0.24 – 0.3 mm
…
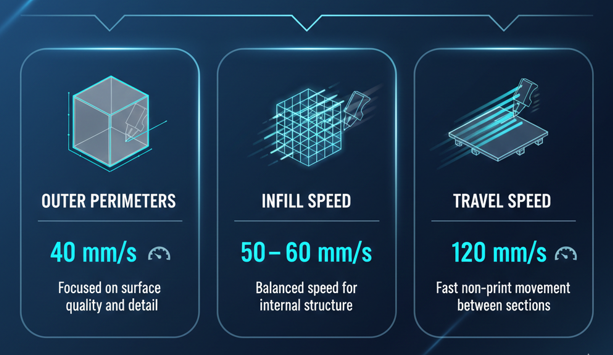
Print Speed
- Outer Perimeters: 40 mm/s
- Infill Speed: 50-60 mm/s
- Travel Speed: 120 mm/s
Temperature Settings
For detailed advice on ideal printing temperatures and how they impact print quality, refer to the PLA temperature guide at pla print temperature guide.
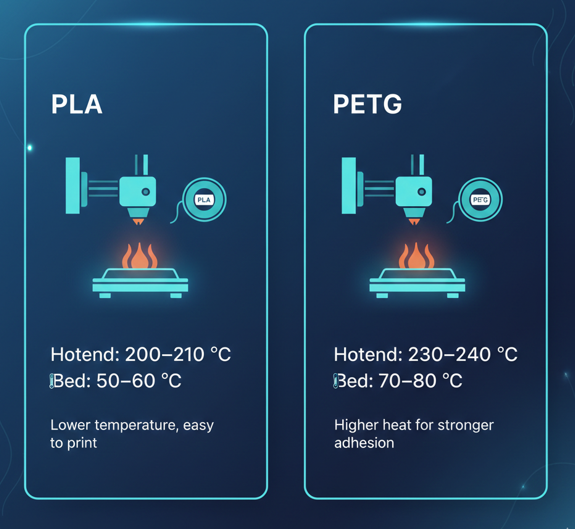
PLA:
Hotend: 200–210 °C
Bed: 50–60 °C
PETG:
Hotend: 230–240 °C
Bed: 70–80 °C
Retraction Settings
For Bowden systems like the CR-10, the default retraction settings should be:
- Retraction Distance: 5–7 mm
- Retraction Speed: 40–60 mm/s
For Direct Drive systems, like the CR-10S Pro, retraction will be reduced to about 1-2 mm.
Support Settings
- Support Type: Grid or Tree Support (depending on geometry)
- Overhang Angle: 45° or higher
Adhesion Settings
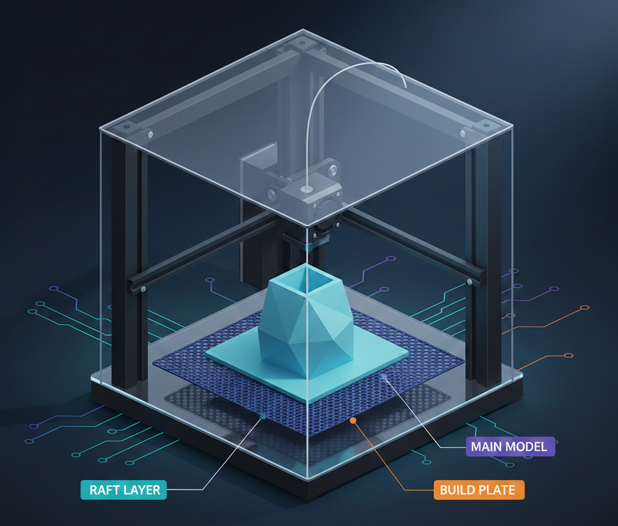
- Brim: A great option for large prints to avoid warping.
- Raft: For prints that may have adhesion issues.
Advanced Settings and Fine-Tuning
Once the basic settings are in place, you can fine-tune advanced settings for better quality and optimized results. Here’s where you can make the most impact:
Start and End G-code
The Start G-code ensures that the printer initializes properly before printing, and the End G-code controls the shutdown after printing.
Example Start G-code:
G28 ; Home all axes
M140 S{bed_temperature} ; Set bed temperature
M104 S{print_temperature} ; Set hotend temperature
G1 Z0.2 F3000 ; Move to safe height
Example End G-code:
M104 S0 ; Turn off hotend
M140 S0 ; Turn off bed
G1 Z+10 ; Move the nozzle up
M84 ; Disable motors
Custom Filament Profiles
You can create custom filament profiles for different types of filament (e.g., ABS, PETG, TPU) by adjusting the temperature, print speed, and retention settings accordingly.
Common Issues and Fixes
Even with proper settings, issues can arise during 3D printing. Here are some common problems and how to fix them:
Poor First Layer Adhesion
- Fix: Ensure the bed is level and the nozzle is at the correct Z-offset. Try using a brim for better adhesion.
Stringing or Oozing
- Fix: Increase retraction distance and retraction speed, and lower the print temperature.
Warping
- Fix: Use a heated bed (if not already in use), and increase bed temperature
Alternatives to Creality Slicer
Although Creality Slicer is a solid choice for Creality printers, some users prefer alternative slicers that offer more features or customization options.
Ultimaker Cura
One of the most popular slicers, widely praised for its user-friendly interface, extensive printer profiles, and plugin support.
PrusaSlicer
PrusaSlicer offers a range of advanced controls for users who want to fine-tune every aspect of their print. It’s often used by experienced 3D printers.
SuperSlicer
A fork of PrusaSlicer, SuperSlicer gives even more customization for advanced users and is becoming a popular choice for Creality printer owners.
Conclusion
Setting up a Creality Slicer for your CR-10 is essential for getting high-quality, reliable prints. Although the software is easy to use, understanding the core settings and knowing how to fine-tune them will allow you to get the best possible results. If you don’t find your printer model in the pre-set profiles, don’t worry, manual setup is simple and can get you up and running quickly. For additional resources and slicing guides, visit at thecrealityslicer.
By following this guide, you now have the knowledge to not only set up your slicer but also optimize your prints for better quality and performance.
Can I use Creality Slicer for other Creality printers besides the CR-10?
Yes, Creality Slicer supports a wide range of Creality 3D printers, including the Ender series, CR-10S, and CR-10 Pro. You can select the appropriate model from the pre-configured printer profiles, or manually adjust settings if your specific model isn’t listed.
How do I adjust print speed without compromising quality?
To adjust print speed without sacrificing quality, start by reducing the speed for outer perimeters (around 40-50 mm/s) while increasing the speed for infill and travel. Always run a few test prints to ensure quality remains high, and avoid too-fast speeds on detailed areas.
How do I set up Creality Slicer for flexible filaments like TPU?
For flexible filaments like TPU, reduce print speed (around 20-30 mm/s) and adjust the retraction distance (lower it to 1-2 mm). You should also increase the print temperature to 220-240°C and ensure your extruder can handle flexible materials without too much tension.
Why is my CR-10 printing with under-extrusion, and how can I fix it?
Under-extrusion is usually caused by a clogged nozzle, incorrect filament diameter, or low extrusion multiplier. First, ensure the nozzle is clean, check the filament diameter in your slicer, and increase the extrusion multiplier slightly to compensate for the low extrusion.
How can I make my prints more accurate with Creality Slicer?
To improve print accuracy, ensure bed leveling is done correctly before each print. Additionally, fine-tune settings like layer height, print speed, and temperature based on the material you are using, and enable supports or brims for complex geometries to prevent warping.

I share practical insights on the latest 3D-printing software and hardware, helping makers navigate tools and technologies with confidence. My goal is to make digital fabrication simple and accessible for everyone.